} -->

Tuesday, 31 March 2015

Storage in the Classroom

Finding a system to organise all your teacher resources can be tricky. Trust me though, when you finally find the right system- everything becomes easier!


I trialed many different ways of storing games but this is by far the easiest to keep organised. This is a special tub for file dividers- it has grooves along the side to hold them in properly. I label each divider and then place each game inside in a zip lock bag. Some of the bags get pretty thick but the file dividers are able to cater for that. These tubs also come with very sturdy lids so you can pile them high! Sometimes I take out particular games, other times I take out whole files. TIP: Sticky tape the labels in place so they don't fall out!


Fold-able storage boxes are great for lighter items. Have a couple of them flat packed in the cupboard and pull them out as needed. I like them for storing paper offcuts (scrap box) and recyclable resources.

Containers are fantastic in all sorts of shapes and sizes. I love little ones to store knickknacks. Here are some storing my guided reading resources. Click here to read my post on guided reading.


For my weekly resources I use these wheelie draws. Each one is labeled with a subject. I used to have a concertina file with each day of the week labeled but I found that difficult on the weeks where I was prepared more then a week in advance and booklets are too big for them. I use the bottom few draws for certificates, student notes and original sheets to come home and be filed.

I use the hanging canvas pockets for notes and work to be sent home and work needing to be finished. My brother made these for me.

I stole the next idea off of a fellow teacher and wanted it in my classroom simply because of how pretty it looks! This is just a clear set of draws that I keep A4 paper in. 

For A3 paper I used the box some A3 Blank paper came in and I pushed in one of the sides so I can see the colour choice at a glance. I just lift up the paper to pull out a particular piece.

It wasn't until a few years after I started teaching that I finally got all my paper resources out of big piles and organised.  I have lever arch files for my general subject areas. I made up labels and have the files colour coded according to the colour ACARA has assigned the subjects.


Inside the files I use A4 sleeves. Some sleeves contain multiple sheets and some only contain one. It depends on how similar the sheets are and my likelihood of using them.  I use sticky tab labels down the side to section each lever arch out more. Unit plans are really easy to lift out and put into my planning files at school.

I use display files for my theme resources so I can just take a single display file into school when we change topics. 


I hope you found some helpful organisation ideas! Good luck organising!


Sunday, 22 March 2015

Guided Reading Setup, Tips and Tricks!


Guided Reading is all the rage right now. Most schools seem to be mandating it as a whole school strategy and that was the case for mine last year.
I had done reading groups before and always felt I spent more time doing behaviour management than actual teaching. But I believe in whole school approaches so through trial, error and research I have finally got guided reading working for me.

Set up
This is my guided reading station (and my main desk area). I love the horseshoe desk so much, the practicality of it is endless and if you are doing guided reading without one you are really missing out. I currently keep the book for each group in a white bookshelf behind my desk although I will eventually gets tubs (when I can find one style in 5 different colours).

Resources
I have all my guided reading resources on the top two shelves behind me organised in containers.
In small tubs I keep motivation tools. 

Witches fingers are great. I got a ten pack off eBay for less than $5.00. 

Magnifying glasses are very exciting for students and I got a set for less than $10.

Pointers can be as simple as fun pictures on popsticks. I got these zombie pictures from Ainslee Labs on TPT.

These questions fans come from Runde's Room. I purchased the bundle so I got 6 different sets. I love them because all the questions are sorted into categories. I never struggle to think of questions and I ensure I am covering a concept in depth.
Laminated card and whiteboard markers are great for any written work. Do yourself a favour and get magic erasers (bulk buy on eBay) for rubbing work off- 10 times as quick and easy as a tissue or cloth)

I also love this resource for assisting your students with reading problems. 

Planning
For term 1 I have a different strategy for each week that all groups cover. In term 2 I get more targeted with each group, focusing on their specific needs. 
My current planning document is a simple table that has the group names and days of the week as headers. Each section explains what they are doing at each activity and a comments column at the end. I hope to take this to a higher standard soon.

Organisation

While I am with my guided reading group I like to have the rest of my students in groups. They rotate through 4 activities each week. I use the chart above to show students which group they are in and what their group is doing. The chart has blue tacked names so I can easily change the groups based on student needs. All the pieces are laminated so I change the activities as needed. I have either 4 or 5 groups depending on student needs. When I have 5 groups I still only run it 4 times a week but while my top group is reading their text my weakest group is with me, then they swap and the weaker group re-reads their text.
By having the chart I am able to tell my students to go straight to their activity without any instruction time, 

Other Students
I change the activities the rest of the class are doing on an as needed basis. This term the other group activities are as follows:
SRA Comprehension box: Those good old leveled cards that students work through. Ensure you check on the students every now and again to see what pace students are working through the cards.
Computer/iPad based: For term 1 students have to do interactive comprehension texts on Studyladder. Its a great program, it's free and has a wealth of activities. Each student has their own log on and you can set tasks for the class and see results. In term 2 I pick a more targeted text or activity for them to complete.
Oral Reading: My biggest hate of guided reading is the lack of oral reading (did you know the reading part of guided reading is meant to be silent?). To ensure students are practicing this important skill I give them an easy text (independent level 95% + accuracy) and a voice card. Students attempt to read in the given voice and then vote on the best voice. The best voice presents to the class and receives a reward for public reading. On the last day all the winners read and an overall winner is announced. In my experience the people change week to week. I got my voice reading cards from here and here. (they are in the picture behind the pointers).

Tips and Tricks
  • Make sure the other students are completing activities that have a high level of accountability i.e. easy to check to see if they did what was required.
  • Have as many of the other activities as independent as possible- don't sit students together when they are working on independent tasks.
  • Discuss with students the noise requirements. I use ninja mode. Students have to sneak around like ninjas making no sound (think ninja turtles) and sometimes I will pick the ultimate ninja for a reward. This could also be called mouse mode. 
  • Noise level apps are also great - provide students a reward if they stay under a certain noise level. 
  • Wear an accessory when doing guided reading groups and explain to students that when you have that on they are not to come to you.
  • Keep sessions short- this will ensure students are on task and don't get bored.
  • Teach independence and problem solving strategies. What should they do if they get stuck while you are with a guided reading group?

That's how I make guided reading work for me. Hope you found some useful tips!


Saturday, 14 March 2015

Shamrock St Patrick's Day Word Wall

With St Patrick's Day just around the corner I have whipped up a Shamrock Shaped Word Wall.
I love these word walls. They really stand out in a classroom and are incredible useful.


Remember I have an Easter Word Wall available for purchase (Click here)


I have an insanely cool word wall coming out this Christmas so make sure to follow my blog (link to the right), facebook page or TPT.

Saturday, 7 March 2015

10 Things a Teacher Wants to Say to Parents

Whether we can't say it because we'll get in to trouble or its something we just wish parents knew,  these are 10 things teachers want to say to parents.

Open Letter to Parents:

1: Do NOT buy the cheap pencils!

This is a pet peeve of teachers all over the world. You might think you are saving a bit of money purchasing the ridiculously cheap pencils at Target but what you have actually done is doom your child to sharpening those pencils as they keeps breaking. In the end most teachers end up giving those students a pencil. Please buy the better pencils, usually red, NEVER buy the yellow pencils. While we are on the subject of pencils stay away from the bendy ones too.

2: Get your child to school on time!

Even just a few minutes can be highly disruptive, annoying and deprive your child of learning. They need time to settle before school and catch up with their friends. Important information is usually relayed in the first 10 minutes after the bell. We understand sometimes things happen but it should never be on a regular basis.

3: Leave your child at school till the bell!

You expect it on the Friday before a long weekend but where are they going all the other days?  I can guarantee a child picked up early will forget the point of the lesson they were in and not bring home any notes for that day.

4. Do NOT ask for homework for your holidays!

It's a common scenario, parent informs teacher of upcoming holiday then asks for work for their child to do (probably because you think it makes you look like a better parent). The teacher slaves away preparing work (you can't send the regular class work because if students could do that by themselves we wouldn't need a teacher- a lot of teachers don't even use worksheets anymore). The worksheets go home and stay home, they don't get taken on the holiday. They either don't ever get completed or get done by the child the night before they return to school. Most of the answers are wrong and you still need to catch the students up on work. Save us the trouble and don't ask!

5. No, Your pet can't come for show and tell!

Thank you for  the avalanche of students wanting to bring their pets in that you have started. A photo will do fine.

6. Don't bring in take away for lunch

While there are obvious (health) reasons to not bringing in junk food for your child's lunch it's also very annoying for anyone else who has to sit there and watch. It's very hard to eat a plain sandwich when someone near you is eating take away.

7. Check how your child smells

There are many different reasons a child smells, rotten shoes, BO, cigarette smoke, unwashed clothes or poor hygiene just to name a few. In a tiny classroom bad smells can be nauseating.  It segregates your child from others who identify them as the bad smell.

8. We can tell if you read to your child or listen to them read

The difference between kids who read at home and who don't is monumental. It is the single best thing you can do at home with your child.

9. Your child never tells you the whole story.

Every child does it, its a protection thing. So when they come home and tell you a story from school take it with a large scoop of salt. If its a story about something another child did to them its highly likely they did something first or back to that child. Or maybe you ask what the teacher did about it and they say "nothing". Why did the teacher do nothing? Because they never told us about it, which brings me to number 10....

10. We're not perfect.

We try to be, we want to be, but we're human. We make mistakes, we forget things and we don't know everything. Most of all we are not mind readers!

Monday, 2 March 2015

Give Away! Celebrating being in Top 150!

I am celebrating today!
Today I entered the top 150 all time best Australian Sellers. Currently I am sitting on 147!
To celebrate I am holding another give away on my Facebook page: facebook.com/mrsamy123
To enter you need to be a liker of the page and then share the post about the giveaway! The winner will get to choose a product from my store valued at $10.00 or under.

Here are some of my suggested picks for the winner:


My Narrative Writing Unit is selling like hot cakes! Engaging, creative and sure to improve your students writing this narrative unit is a blast to teach. Check it out here.
Just in time for Easter, this word wall is sure to catch everyone's eye. Print, cut and laminate and then arrange it into the basket. Check it out here

One of my best selling resources is this First Aid Unit. It teaches life saving skills while practicing many other key skills. It is a big hit with the students! Check it out here.

If you are a fellow TPT seller then you might be interested in my basic peoples kit. Their are 50 unique characters ranging in age, occupation and ethnicity. Check it out here.

These Narrative Prompt Picture Cards can be used for a variety of fun and engaging lesson.  I love giving students one setting, problem and character card and getting them to write a story involving all three elements. Check it out here.

Thursday, 26 February 2015

My NAPLAN Plan of Attack!


This year will be my forth year in Year 3. I feel like I have NAPLAN prep down to a science! Today I thought I would share with you my complete Term 1 planner.
Let me put in a disclaimer here: I DO NOT teach to the test. What I do is teach the Australian Curriculum which the NAPLAN test is based on. From that I pull out the items most likely to be covered by the NAPLAN and ensure I cover a wide variety of topics. 

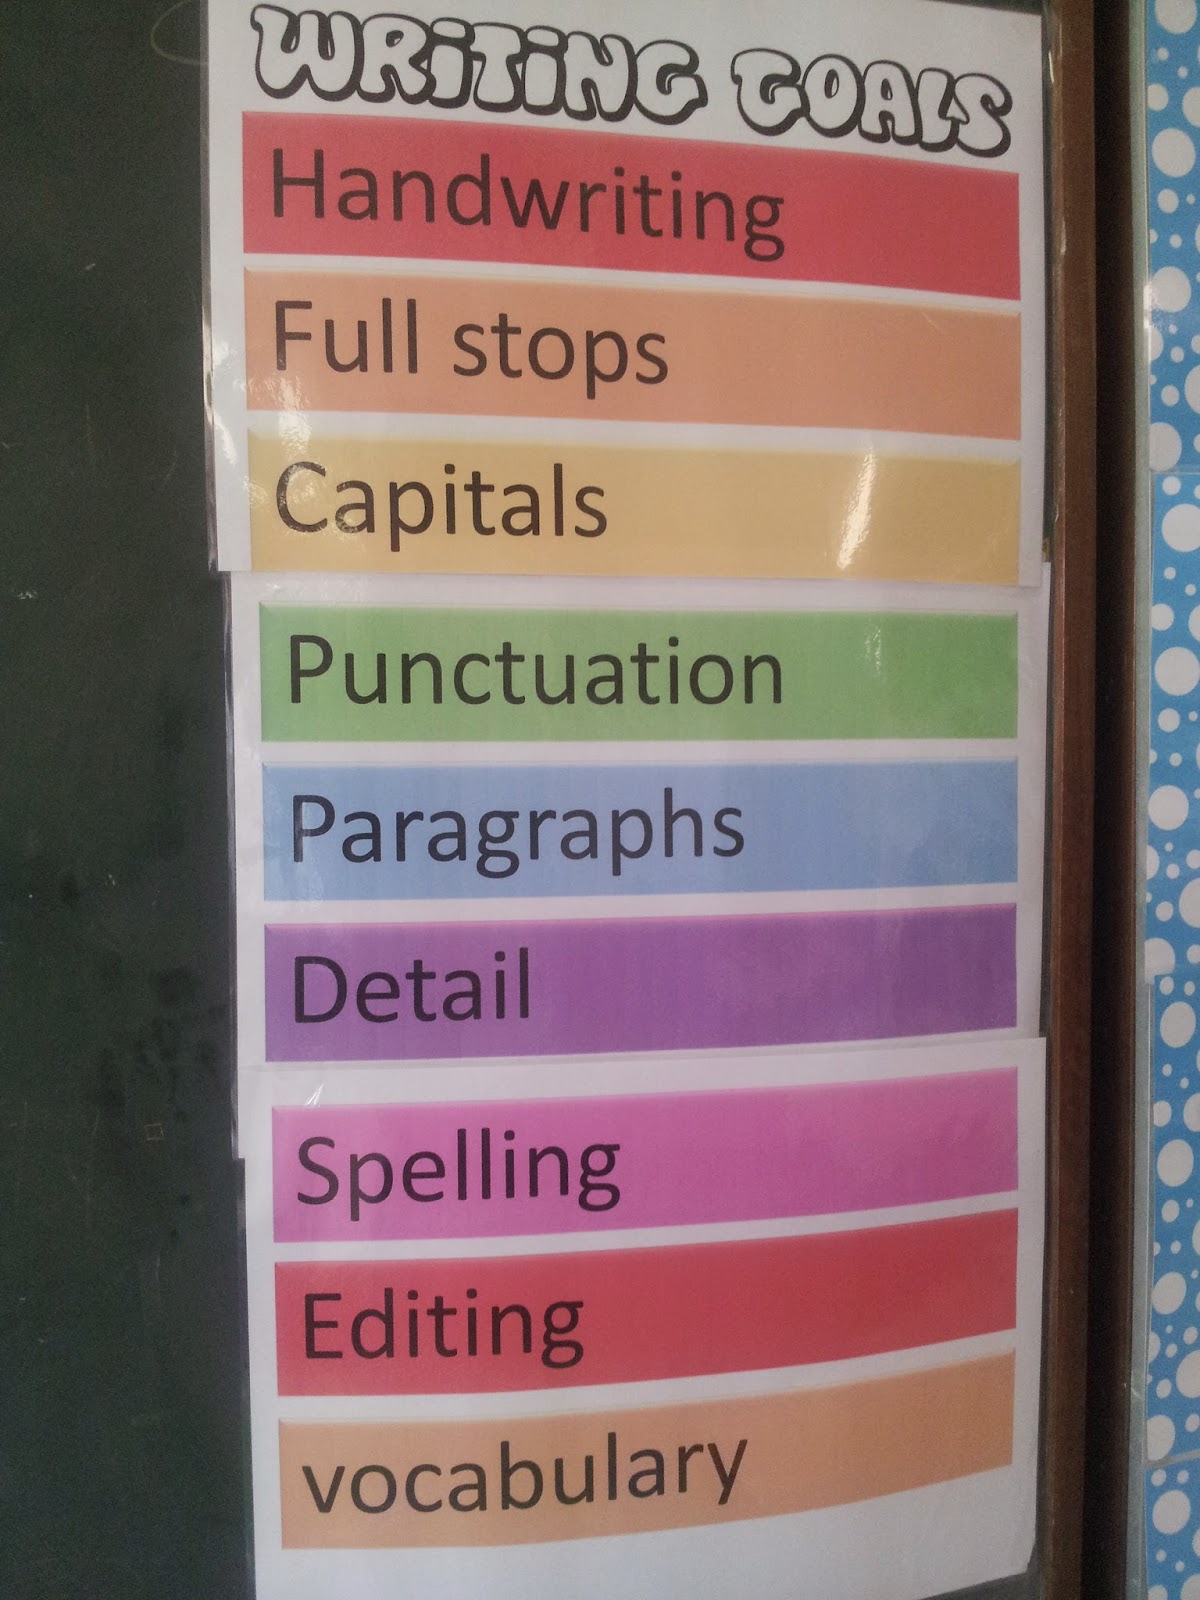
Diary Writing: This comes up first on the planner because it's what I do first up on a Monday. It's a time where the students can practice writing skills learnt in the previous weeks. I set goals for their writing using this poster.

 Reading: I will put up a more detailed post on my guided reading sessions soon. This term I am using past NAPLAN reading passages as my guided reading texts. I use past questions and my own to improve student comprehension. For whole class lessons I have been using stories by Beatrix Potter as you can get them online and use an interactive whiteboard to allow your students to see.

Punctuation and Grammar: I use punctuation characters to make learning and practicing punctuation fun because by year 3 the students think they know it all.
I made up a booklet of worksheets because I couldn't find any worksheets that would be suitable for a variety of skill levels. It ensures that all students are able to complete some of the worksheet but all students feel challenged.


Vocabulary is sectioned into three parts over the term. The first is descriptive words that help teach students interesting words to use in their writing, Then it moves on to a couple of word lists that are helpful to prepare for the NAPLAN Conventions test like conjunctions, The last part is test word vocabulary. The lesson usually just involves reading the words in a way that sounds like they mean (e,g, aggressive in a aggressive tone with facial expression), the students repeat it and we define the word when students seem interested in the word being said.


Word Study (which ends up changing to grammar) are the sounds most likely to appear in the NAPLAN Spelling test. I cover these by doing individual, group or class brainstorms of words that contain that sound. If a student says a word that does not have that particular sound in it I always make sure to write that word up so students can see what it actually looks like.


Maths: I have segmented my maths sessions into 3 parts (or you could say 4) this year to maximize efficency. I start off with a mental maths section covering basic skills. A lot of which I know will come up in NAPLAN.  I use this number crunch display to save paper. Students record their answers in their books and we mark as a whole class Monday to Thursday and I mark and record their results on a Friday.

Click here to purchase Number Crunch (Also comes with 4 worksheet versions)

The next part of the lesson is explicit teaching and demonstrating of maths skills. I always start from a very basic level before working up to what they need to know as year 3s. I also chuck a bit of year 4/5 information in which some kids are able to retain. This is directly followed by them practicing the skills either by a hands on task or worksheet.

Finally we play games covering either the concepts taught in that lesson or basic skills games. These may be whole class, group or individual. We recently did card games practicing rainbow facts (numbers that add to ten).

NAPLAN Revision: At the end of each week I get my students to do a quick 15 minute quiz. These quizzes not only allow students to display their understanding of the concepts taught that week but also familirise students with question types. Without these practise quizzes students would get answers wrong simply because they shaded two answers in or didn't understand what to do. I begin the lesson by introducing or revising that NAPLAN strategy for that week. These strategies are used by adults all the time during tests but need to be taught to students. I use characters to make these strategies stick in the students head and make learning them more interesting.

Careful Cara - Read the question carefully
Whinging Whinnie - Don't get upset about the test
Naughty Nick - Always one answer that is obviously wrong
Diligent Dolly - Working quickly and monitoring the time
Sneaky Sarah - Two answers are usually very similar
Guessing George - If in doubt guess, but use other tricks to eliminate answers


I then give students time to complete the quiz. To help gradually build up their confidence with tests I go through the first one to two tests with the class and discuss or give hints to the answers. The next few tests I only read the questions. Then they begin doing the test independently.
As students believe they have finished the quiz I mark their answers and give them a second attempt at any they get wrong. If on the second attempt the answer is still wrong I briefly explain to them which is the correct answer. My students then go on to IPad free time. Once everyone is finished I go through all the questions with the students to make sure they understand the concepts the question was testing. Incorrect answers can be recorded for later small group activities or one-on-one help.

You can purchase the quizzes I use here:
While I used them weekly they can easily be used daily in Term 2 until NAPLAN.

For NAPLAN writing I do two seperate whole class weekly lessons.

Persuasive Writing Unit.
This unit is 10 lessons long and explicitly teaches the concept of being persuasive and then how to structure this into a persuasive text. It goes through several key techniques for making their persuasive texts more interesting.


Narrative Writing Unit 

This narrative unit mirrors the persuasive writing unit. It has fun and engaging lessons that teach students how to structure narratives, how to form ideas and key elements to include to improve their narrative texts. 

Practice Tests:
I do one full practice test (Numeracy) at the conclusion of term 1 that I then analysis for topics that I need to revise in term 2 with either the whole class or small groups.

The other part of preparing students is to make them understand that NAPLAN is 4 tests that you do your best in but they are not something to stress over. I explain the format of the NAPLAN, that no one is expected to get 100% on it. That is has questions from the Year 5 and 7 NAPLAN test. I also tell them that not even I usually get 100% on the test. I tell the students that doing their best will make me proud and that is something they should strive for.

Using these strategies above I avoid having any tears or comments of 'I can't do this' during NAPLAN week.

Good luck with NAPLAN 2015!


Friday, 13 February 2015

Classroom Tour 2015!


I once did an interview for a teaching job where I showed pictures of my classroom because I believe your classroom is a great insight into what kind of teacher you are. It must have made a good impression because I got the job! 

Come and take a tour of my classroom!

My classroom theme was very haphazard for the first few years....I just put up what I thought was cool, purchased whatever coloured containers caught my eye and then tossed up a large piece of purple material left over from my wedding. A few years later came my addiction to Pinterest and hours spent looking at beautifully coordinated classrooms.This year I have tried to pull my classroom into a theme and rainbow seemed the easiest choice given my classrooms current contents and not wanting to replace a lot of the things I already own. 

To the left of the door I have the evacuation posters and file, my duty vest, bag and hat and the hanging thing (red, orange, green and blue) is a canvas pocket my brother made for me. I use it for storing notes/work that need to go home. Its particularly good when students are away and you have to save notes for them.
Here is an overview of the rest of that wall and half of the 'front' wall.
I like to use plastic table cloths to cover up my pin up boards. Underneath they are an old cream coloured carpet material. I staple the table cloth up with borders around them to hide the edges.The red, orange and yellow table cloths are from last year and are still holding up well.  Below the pin up board I have the 'typical' teachers desk (more on what I use for a desk later) which I have covered with the printer, student portfolios, lunch basket, borrowing box and spelling lesson material. The draws hold materials for Comprehension Box activities (more on those in a later post). Next to that is my book case...I'm not entirely happy with it because it so large but the books stay in good condition unlike the standard bookcase. Then we have the computers and a chair stack.
Above those pin up boards are windows. I took down the curtains that had been there for a few years with the intention of making new ones, but found it made the classroom more open without them. The wooden board says 'Somewhere over the rainbow, skies are blue, and the dreams that you dare to dream, really do come true' and was a gift from a student. I also have objects to use as speaking sticks sitting on the mantle.  Along the top I have reading strategy posters by Nicole Blunt.

To the 'front' wall now. I have the current reward system on the green background (will do more on that in another post). I have an Are you Organised? chart which reminds students what they must do at the start of the day. Next up is a tricky word hat and days of the week word cards from Teach This. This year I am trialing the Raise A Number system where students show a different number of fingers for a question, bathroom, sharpen a pencil and getting a drink. So far it is working well and saving loads of time. I especially love it because it means the flow of a discussion doesn't get interrupted by someone asking to go the toilet. I got mine from Little Lovely Leaders.

On the other side of my interactive white board I have my computer, hand sanitiser and my job wheel. Click here to get my job wheel.


The coloured table cloths continue along the back wall. At the top of the wall I have my Birthday train. You can just see the students pictures sticking up out of the carriages. Click here for my birthday train. The coloured pencils are from Communication4All .

Across the middle of my room I have a large purple piece of material draped. It helps to brighten the room up and always catches peoples eyes. The rainbow bunting I made using card stock.  I laminated the pieces to ensure it lasts a long time and remains looking good.

I use this horse shoe desk as my desk. I love it! I don't know how I lived without one before.  I keep it clear so its always ready for working with children in any way.

I have a wheely chair to help with posture, comfort and ease. The white bookcase is used for storing books for guided reading.
Behind my desk and next to my mat area I have a rainbow draw system. In it I keep all my photocopied sheets grouped by subject areas. Sometimes they will have only that weeks worth of sheets and when I am super organised they might have a whole terms worth.


Behind my desk I have my stationary in easy reach. I love post-its, highlighters and bull dog clips! I have coloured pens, sticky tape, pins, paper clips and a stapler. I use clip boards for any current individual assessing I am doing. On the ledge behind that I have a three tiered tray system. The top is for works in progress, the middle for marking and the bottom for gluing or filing. The files next to that are filled with planning documents, photocopiable resources (like WTW), assessment files and a templates file. On top of the multi coloured draw system I have a display file with my daily workpad. More on all those things in a later post. 
Directly behind my desk I have my small group resources. The top two shelves are guided reading resources and sight words. The bottom shelf is whiteboards, markers and maths blocks. More on these in future post.
The shelf adjacent to that holds my consumable resources like magazines, newspaper, masking tape, pasta, paper plates, PVA glue, pipecleaners, popsticks, paper cups and wool.

I have a sliding door out to a shared grass area that I stack chairs in front of. I use chair stack signs to remind students where to stack the chairs. Before I used these I found students would stack the chairs where ever they wanted. You can get the sign free by clicking here. As the chairs are not there during the day, having this area open makes the class feel larger and brighter. I like to paint pictures on the wall that match our theme. The dinosaur, bush and pyramids are left over from previous years and will stay up until I get sick of them or they start to look tacky. The cabinet in the corner holds the mats for assembly. On top is a material box with scrap paper. 


Along the back wall I have my reading groups, number crunch and writing goals displays. Click here to purchase my Number Of the Day display. 

I use laminated labels for the student names that are blu tacked up so I can easily swap students' groups. I write the acitvities with whiteboard marker so they can easily be changed as well. 

On the whiteboard I have my No Fuss Classroom Calendar. I don't like to keep a lot on my whiteboard in case my Interactive Whiteboard is not working (like right now). Click here to purchase my Calendar. (Available in a few background themes)
There is a tray for each of my students and the rest of the trays have my spelling lists in theme. Click here to download my tray labels. Click here to read more about my spelling program.
Above the boards are Multiplication charts, at the time they were the largest numbers I could find. I printed them from TeachThis and photocopied them onto coloured card. I have since made my own with larger numbers but haven't put them up yet.  Click here to see my rainbow chevron set

This is my visual timetable. I kind of wish I had printed it out one size smaller, but it does fill this area nicely. Students can easily see what they are doing any time of the day. Click here to purchase this timetable.


This is my Writing Goals Poster. I plan to blu tac up students names to the goal they are working on. Click here to download this poster


Above my door I have my class rules. The students always help me come up with them and in previous years I have written them on a laminated poster (you can see it in the background of the next picture). This year I decided I wanted something bigger and brighter so I turned the rules into A3 posters. The last poster is the the signatures of the children agreeing to follow the rules. They used whiteboard marker so next year I can use them all again (lets face it, kids always come up with the same rules!) Click here to purchase the posters.
Thanks for touring my class with me! I am going to be doing some more in depth posts of different parts of my classroom as the year goes on so please subscribe to the blog (see side bar), like MrsAmy123 on Facebook or follow MrsAmy123 on Pinterest. See more of my products on Teachers Pay Teachers.

Have a great year!